I’d like to dive into a subject that many IT professionals find themselves dabbling in at some point: customizing user accounts in Active Directory by adding unique attributes. This is an awesome feature in AD, allowing us to store additional, specific information about users which might not be present in the default schema.
Why Add Custom Attributes?
First and foremost, let’s address the “why” of the matter. Active Directory is a robust directory service but sometimes, the default attributes just don’t cut it. Perhaps you want to store an employee’s ID from a different system, integrate into an application, or maybe even some special security clearance levels. Custom attributes can fill these gaps efficiently.
The Prerequisites
Before you go ahead and modify the AD schema:
- Backup– Always have a backup of your current AD environment. Any changes to the schema are irreversible.
- Access Rights – Ensure you have the necessary permissions to modify the schema.
- Plan Ahead – Think about the attribute’s name, type, and intended use. Will it be a string, an integer, or maybe a boolean?
Adding the Custom Attribute: Step-by-Step
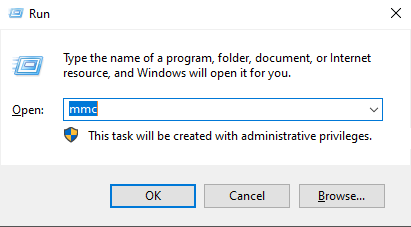
Launch the Schema Management Console: This isn’t enabled by default. To add it, run ‘mmc’ on your server.
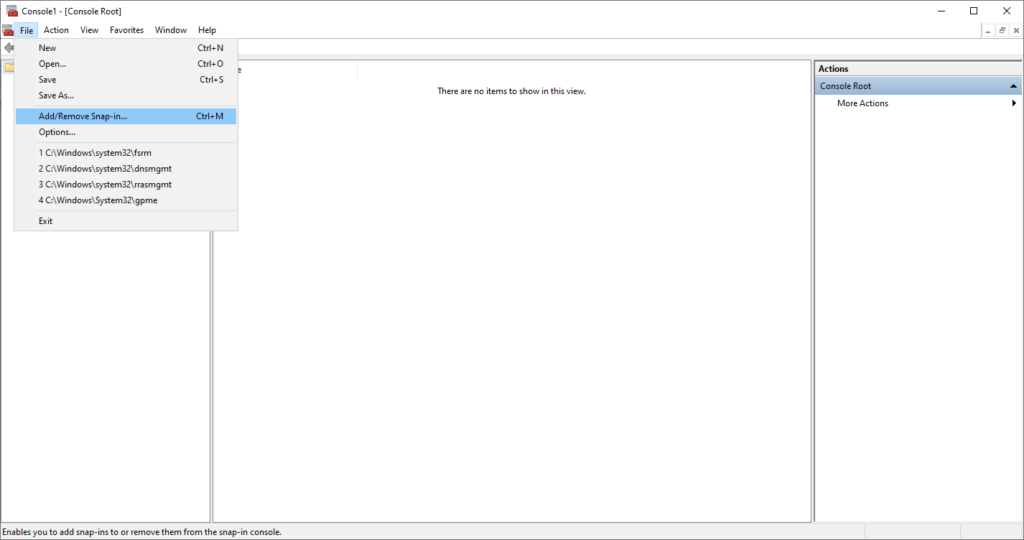
Then ‘File’ > ‘Add/Remove Snap-in’ > select Active Directory Schema.
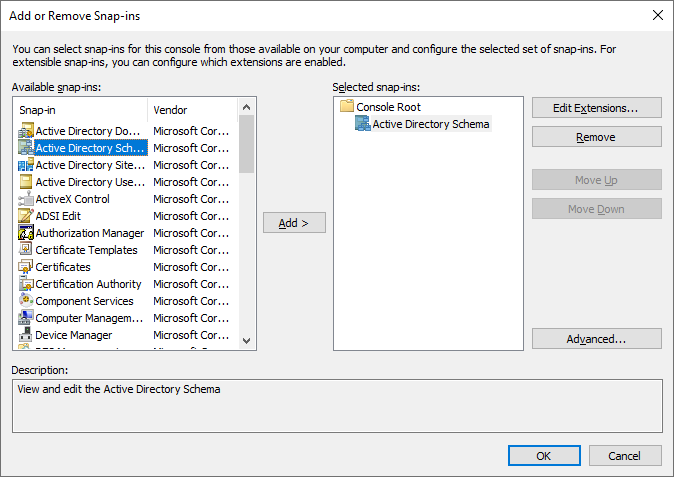
Expand the Active Directory Schema: On the left side, you’ll see ‘Classes’ and ‘Attributes’. Right-click on ‘Attributes’ and select ‘Create Attribute’.

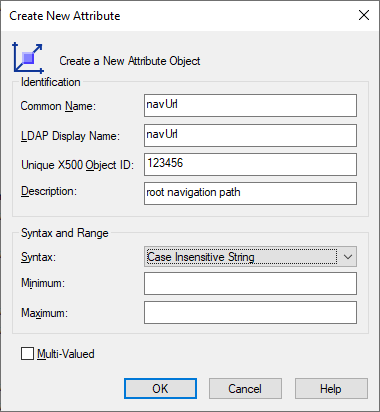
Fill in the Required Fields: You’ll be greeted with a warning since schema changes are permanent. Once acknowledged, provide the details for the new attribute:
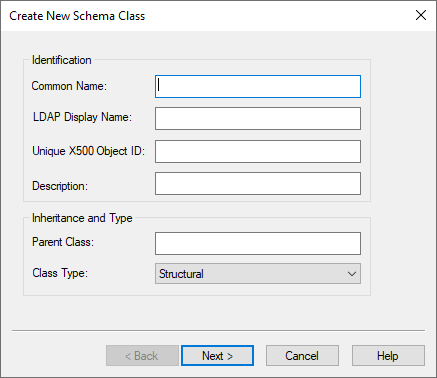
- Common Name and LDAP Display Name: Your chosen names for the attribute.
- Description: A brief description to remind yourself or inform others about its purpose.
- Type: Specify the attribute type, e.g., string, integer, or date.
- Minimum and Maximum: These are optional and allow you to define any constraints on the values the attribute can hold.
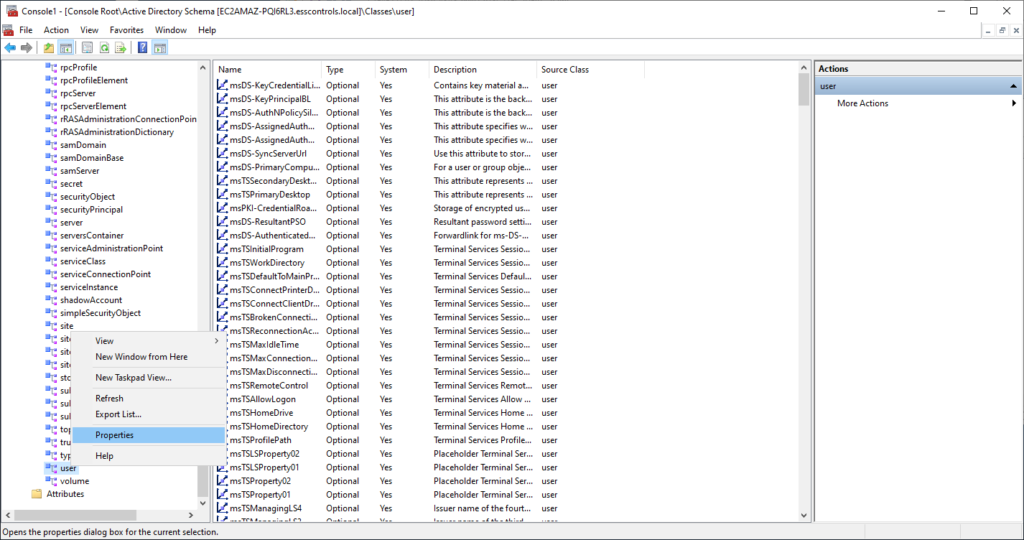
- Add the Custom Attribute to a User Class: Now, the attribute exists, but you need to link it to user accounts.
Navigate to ‘Classes’ > ‘user’. Right-click and choose ‘Properties’.
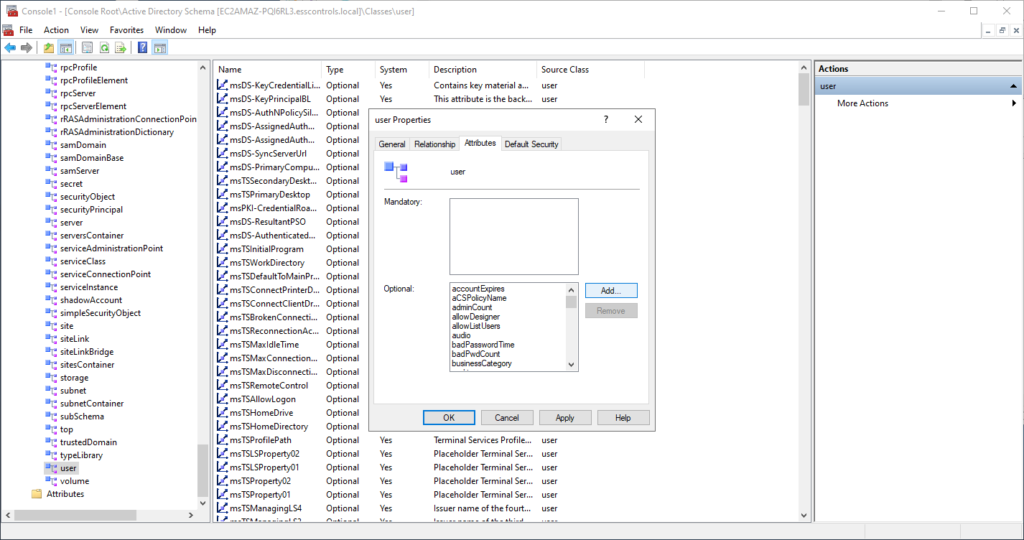
In the ‘Attributes’ tab, you can add your newly created attribute.
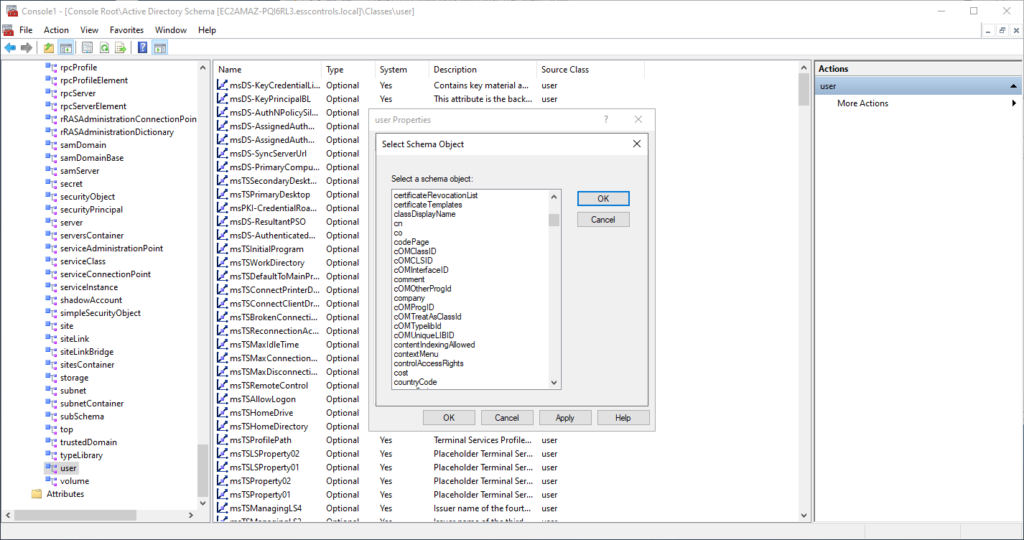
Making the Most of Your New Attribute
With the custom attribute now part of the AD user accounts, the next step is integrating this into your daily workflow. If you’re using any third-party tools or scripts that tap into AD, remember to update them to recognize and possibly leverage this new attribute.
Conclusion
Adding custom attributes in Active Directory isn’t just about flexing your IT muscles. It’s about enhancing and personalizing the way we manage our user accounts, catering to the unique needs of your organization. As with all powerful tools, handle with care, and make sure you’re always taking backups before making significant changes.

